
DIY Acoustics
What will we cover in this tutorial:
– Damping
– Diffusion
– Bass traps
– Finding problem frequencies
– The easy way out
The room in which you want to mix or record will most likely not sound perfect. Too hollow, an annoying boomy sound, or maybe a strange echo when you clap your hands.
That’s because the sound reflects off the walls, floor and ceiling. And that can do weird things with your sound, check out the tutorial ‘Practical(!) audio theory – It’s just a phase’ if you want to know why.
You can get the help of specialized companies to turn your room into a perfect sounding studio. But this can be expensive and you may not have 20k of budget available for this.

So, the alternative is to do it yourself! In this tutorial we will give you tips and tricks to get the most out of your recording/mixing space with a smaller budget in mind. These tips are mainly aimed at creating a music studio. If you’re a voice-over, you’ll want to use a lot more damping than we do here.
Small disclaimer. Acoustics are a tricky business. Fortunately, if you start with the acoustics yourself, it is very well possible to create a workable space. But it often involves a process of trial and error. If you don’t want this, hire an expert in acoustics and let him or her take care of your studio.

Damping
Every room sounds a bit ‘hollow’ or reflective. Just clap your hands and you’ll immediately hear reflections bounce off the walls. Sometimes you can also hear a sort of a metallic ‘bouncy’ sound after your clap. These are flutter echoes. The first step when turning a room into a studio is to get rid of those nasty reflections and flutter echoes.
How? By placing absorbing materials on the walls. This is particularly helpful to temper mid- and high frequencies and makes your space sound a bit more ‘dead’.

Acoustic foam from the DIY store will do, but you can also buy dedicated sets of acoustic panels. Primacoustic London (image below) makes sets that you can buy for less than 300 euros. When using these, experiment a little with the installation, make sure you place the panels in a way they eliminate most of the nasty reflections.

Don’t exaggerate though, you want to keep some of the reflections. A completely ‘dead’ room isn’t nice to record or mix in. Exception is a voice-over recording booth. There you want next to no reflections at all. 🙂
Tip: Want to know how much to dampen your room? Use a LEDE design. LEDE stands for Live End, Dead End. This technique divides your room into two sides: one side is absorbent, the other is reflective. You cover the side in front of you (when sitting behind your desk) with absorbing panels. And you make the side behind you (i.e. the side the speakers are facing) reflective. That does not mean that you leave the walls there for what they are. Unfortunately, that’s hardly ever a solution. On the next page we will have a look at this.
Diffusion
In addition to absorbing sound waves, you can also spread them throughout the room. Because if you don’t do this, you’ll soon get nasty standing waves.
This phenomenon can occur between two walls that are directly opposite each other. A sound wave is played, for example a long-lasting tone. This tone reflects against the wall directly opposite, bounces back and starts to interfere with the tone coming out of the speaker at that moment. So with itself.
The reflection and the original tone will collide. This can result in two things: The tone will get softer or louder, depending on how big your room is and the frequency of the tone. Why? Check out ‘Practical(!) audio theory – It’s just a phase’ for more info.

Standing waves only occur when the walls are directly opposite each other and are reflective. Solution: Make sure the walls reflect the sound to all directions, so that it spreads more evenly across the room.

You do this with a diffuser. Diffusors are also available in many shapes and sizes. Have a look at Thomann.de, there you will find diffusors from Hofa or The T-Akoustik that aren’t that expensive.
Bass traps
Ok, at this point your room shouldn’t have too many annoying reflections in the mid-highs anymore and you should have also eliminated most of the standing waves.
Then you often have one problem left: low frequencies. Their wave lengths are too big to be absorbed by simple acoustic foam or standard acoustic panels. And diffusors also do very little for the low frequencies.
The solution: Bass traps. Also for sale in any music store, like the ones below on Thomann.de.

Where to start with placing bass traps? Put one in every corner of the room, because that’s where most of the low-end builds up.
Often this already solves a lot of problems. Together with some diffusion and absorption, your room should sound pretty decent at this point! If not, you have to dive a little deeper….
Finding problem frequencies
Lets say you still hear some problems in your room and want to fix that. Or you don’t have the money for all those pre-produced panels and bass traps and want to make your own.
When I started building my first home studios, I was very creative with materials to keep it as cheap as possible. I used the strangest materials that weren’t expensive but had about the same effect as specialist acoustic panels: Rubber terrace tiles for absorption of specific frequencies, bookcases as diffusers, hardboard panels with air behind them as bass steps. It didn’t always look nice, but hey, it worked!
You just need to know two things: What frequency is the problem in my room and what material can I use to absorb that frequency?

Absorption coefficient
Anything with mass absorbs sound. But it depends a bit on which frequencies are absorbed by which material. Here you will find a list of some commonly used materials and how much this material absorbs a certain frequency. This is expressed as the absorption coefficient. This is a number between 0.0 and 1.0, where 1.0 means ‘absorbs everything’ and 0.0 means ‘absorbs nothing’.
What frequency?
Okay, great. Now you know which material is best to absorb a certain frequency. But how do you find out which frequency is a problem for you?
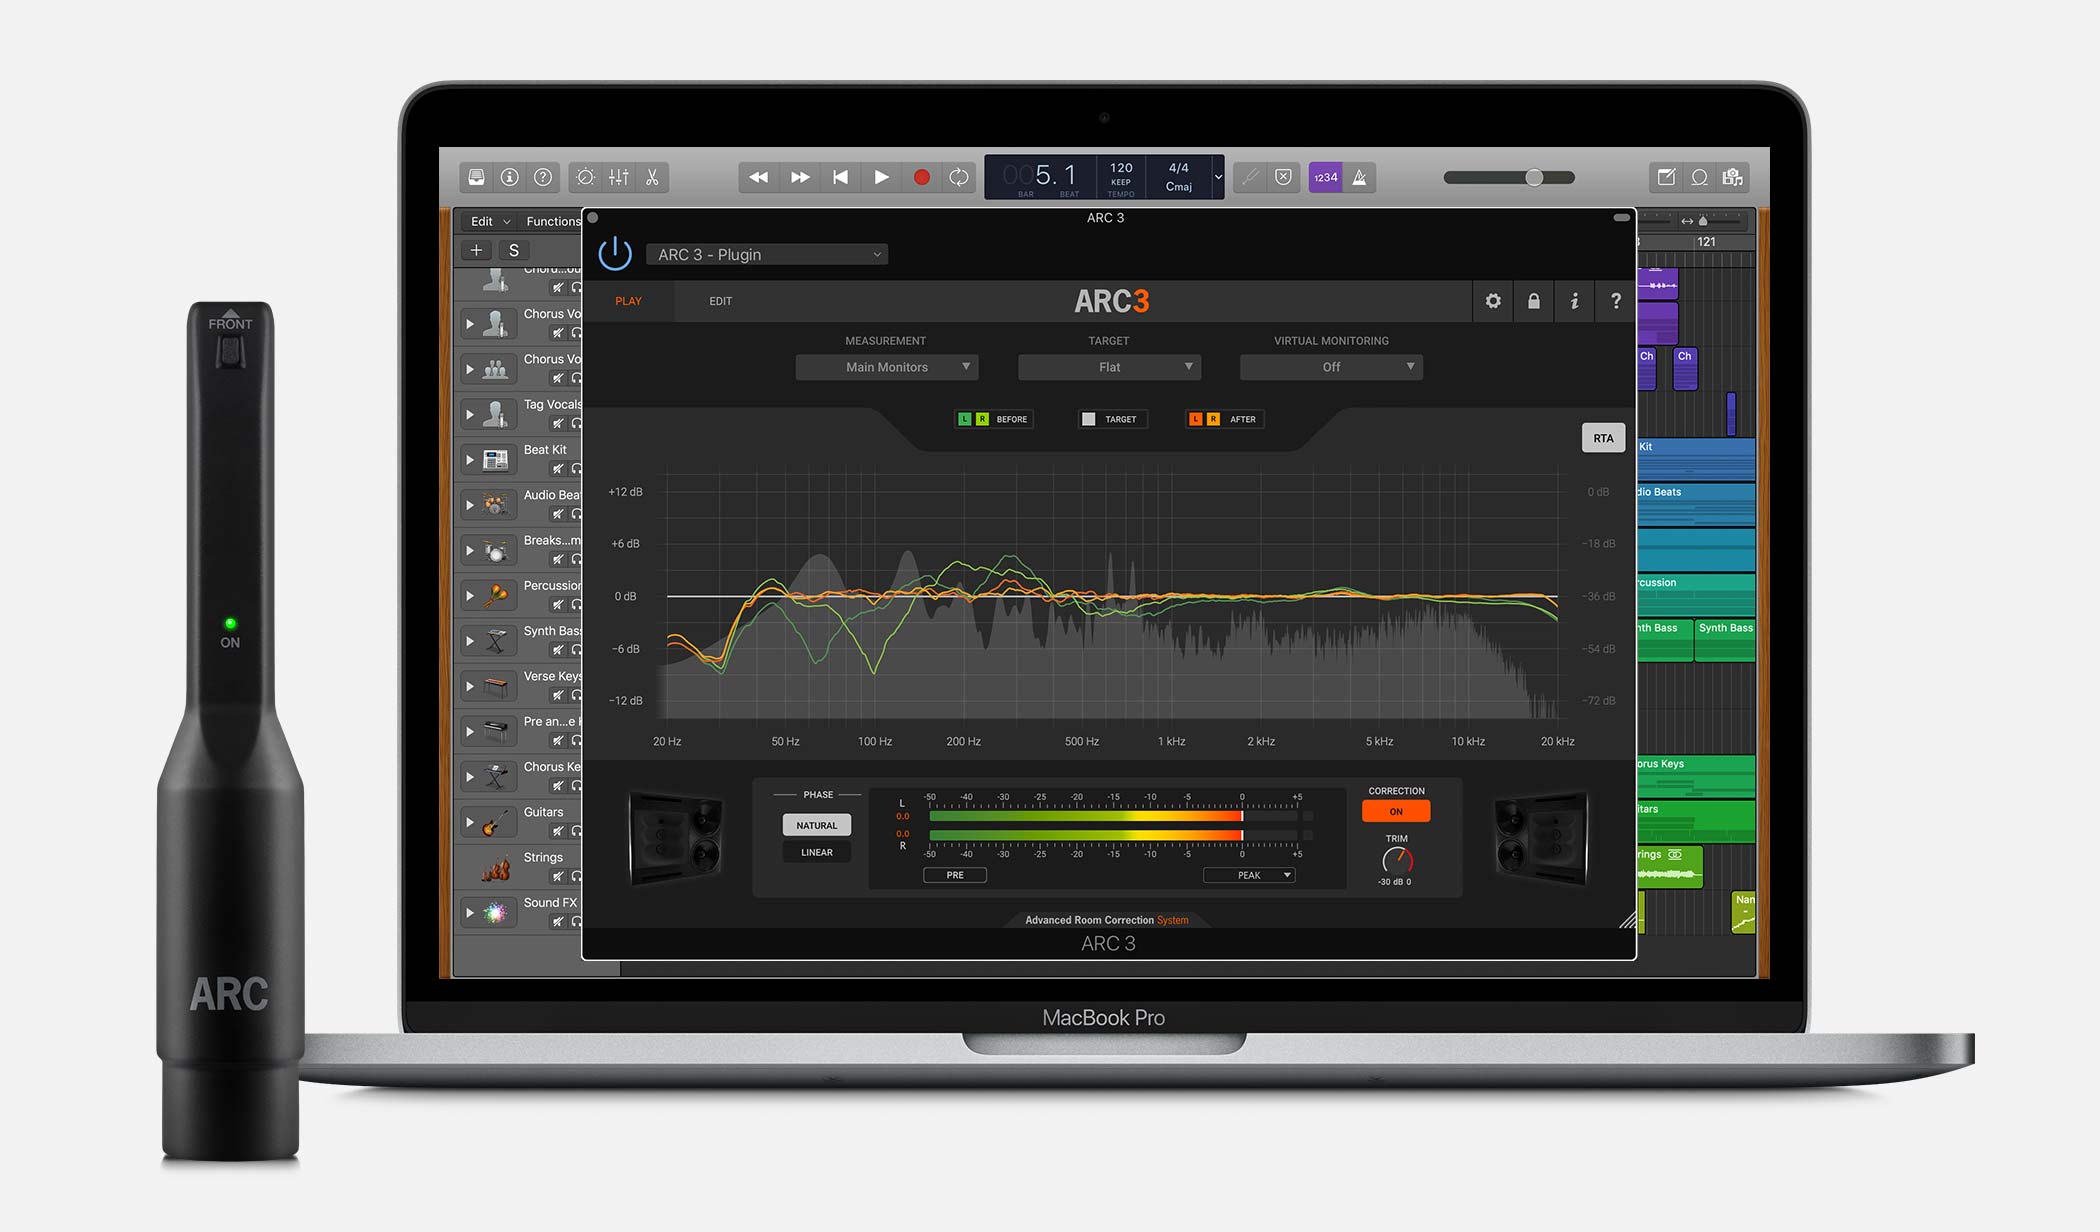
There are two ways: Use your ears or use a special set with a measuring microphone and an analyzer plugin, e.g. the IK Multimedia ARC System 3
With your ears it’s just a matter of playing back music. Use a track that you know very well and make sure you know your speakers well, then you can hear fairly quickly whether there is too much bass, too little mid, etc.
Tip: Play the track from your audio software (Cubase, Logic, Protools, etc) and put an equalizer plugin on it. If you hear that there is clearly too much boomy low-end in there, find this frequency with the EQ and turn it down a bit. Does it sound better? Then you have a good idea what frequency is the problem.
With a measuring microphone it is easier. On the analyzer software that comes with it, you can often see exactly which frequencies are the problem. Then find the right material in the table above to absorb this frequency. Put this material in different places in your room, test where it does most of it’s magic. Slowly adjust your room so that it sounds great.
And what materials you use exactly doesn’t matter! As long as it’s made of a material that addresses your problem frequencies. As I said, you can use rubber terrace tiles for absorption of specific frequencies, bookcases as diffusors or hardboard panels in the corners as bass steps. With the latter you need enough space behind the panel to make it effective.
The easy way out
There is another very quick and easy way to make your monitor setup sound good. By applying ‘monitor correction’. With a measuring microphone you measure which frequencies are too loud or soft in your room. With special software this is corrected on your monitors.
These days more and more (expensive) monitors have complete monitor correction systems built in. But it can also be done with a separate set, like the IK Multimedia ARC System 3 (image above).
This set consists of a measuring microphone and correction software. You put the measuring microphone on the spot where you sit when mixing. Next you have to play pink or white noise trough your monitors (the monitor correction set usually makes this easy for you). The measuring microphone captures this and the software analyzes which frequencies are too loud and which are too soft in your room. This is then corrected with the software.
Even though it can give really good results, it’s a bit like a pain killer: you don’t solve the problems, but fight the symptoms. Besides this, the correction software can’t get rid of reflections in your room. And then there is the problem that if you move to a different spot than where the measuring microphone was, the sound can sound completely different again.
So the bottom line: monitor correction is a great tool, but it doesn’t replace tackling the acoustics with absorbers, diffusors and bass traps.