
Microphones, DI’s and pre-amps
What will we cover in this tutorial:
– Dynamic microphones
– Condenser microphones
– DI’s, microphone pre-amps and Mic vs Line inputs
– Microphone sensitivity
– Proximity effect
I tend to sell things rather quickly on Ebay if I don’t use them for a while. Audio equipment, books, an old camera, whatever. With that money I buy something else that I do need at that moment. You could call it a strange hobby.
But I have learned that you should never sell good microphones. They keep their value. I have sold a few microphones in the past that I would have loved to use now. So an unsolicited tip at the beginning of this chapter: buy good microphones, and don’t sell them anymore. Oh, if you really want to sell them despite my advice, please mail me at gijs@audiokickstart.com, I might want them. 😉

Which microphones you buy depends on what you want to do with them. You choose a mic for its sound. That’s determined by the techniques used in the mic and the design. And of course it is also determined by the placement of the microphone and the room acoustics.
In this tutorial we will look at the different microphone types and their characteristics.

Dynamic microphones
You pick a microphone on its ‘sound’. One sounds better on guitar, the other better on piano. A large part of that sound is determined by the technique used in the microphone. So it’s good if you know something about this, it makes choosing the right microphone a lot easier!
The first type of microphone we’ll discuss is the dynamic microphone. The Shure SM58 (image below) is probably the most famous dynamic microphone ever made. Let’s have a look at various dynamic mics.

How does it work?
A very short physics lesson: when a material that is able to conduct electricity moves around in a magnetic field, then a current is induced. Old alternators on bikes worked on that principle. And so do dynamic microphones. Air (sound) vibrates a diaphragm. This is made of a conductive material. It’s surrounded by a magnet, so it vibrates within a magnetic field, to the rhytm of the sound wave. And there you go, the microphone converts sound vibrations into electrical signals.
Types: Moving Coil and Ribbon
There are two types of dynamic microphones: moving coil and ribbon. The example above describes a ribbon microphone. The moving coil microphone (image below) also consists of a diaphragm (1), but in this case it is attached to a separate conductor (2). This is mounted around a magnet (3). Air vibrations (sound) make the diaphragm move, which in turn moves the conductor in the magnetic field.

If we speak about a ‘dynamic microphone’ we usually mean a moving coil microphone. From now on I will do the same. The advantage of a Ribbon microphone: you don’t have to move that much material because the diaphragm and conductor are the same thing. So the design is a little lighter and therefore able to be moved by smaller sound vibrations (= higher tones). So a ribbon mic will pick up more of the high frequencies.
The dynamic (moving coil) microphone is a bit less sensitive, so it can handle higher sound levels, but it can also pick up just a little less high frequencies. Dynamic microphones sound a bit more ’round’ because of this. They are often also a bit more robust.
Condenser microphones
The second type of microphone we’ll discuss is the condenser microphone, also known as a capacitor microphone. Like the Neumann U87, probably the most widely used vocal microphone in history (image below). What is a condenser microphone and how does it work?

How does it work?
A condenser microphone has a diaphragm (flexible) with a metal plate mounted behind it (not flexible; it is called the ‘back plate’). The diaphragm and plate are both powered. They have a certain ‘capacity’, that means the ability to store a certain amount of electricity. If air (sound vibrations) vibrate the diaphragm, the distance between the metal plate and the diaphragm becomes smaller or larger. And then a physical law comes into play: the capacity changes as a result, to the rhythm of the sound wave. So again, sound is converted into electrical signals.
Phantom power
This technique does require an external voltage to work: 48 volt ‘phantom’ power. You don’t have to connect the mic to an extra power cable, it gets powered via the microphone cable itself. You don’t hear it and don’t see it. Hence the name ‘phantom power’. On all professional interfaces or mixing consoles you have the possibility to turn phantom power on or off on the microphone inputs. If a dynamic mic is plugged in, it doesn’t break if you accidentally put phantom power on it.
Large diaphragm or Small diaphragm
Condenser microphones are often referred to as ‘large diaphragm’ (like the Neumann U87 pictured above) or ‘small diaphragm’ (like the Neumann KM184 below).

According to Neumann a large diaphragm is 25.4mm or larger. Small means 12.7mm or smaller. Not that important, except that a large diaphragm reacts slightly differently to the sound it picks up and therefore sounds different! Microphones have a ‘directionality’, a side they are most sensitive to (we will come back to this). Large diaphragm mics are less precise when it comes to directionality.
It is basically a technical defect, but it works out well in some cases. For example when recording vocals. If you move your head, you don’t hear so much difference in sound. That’s one of the reasons why large diaphragm mics are a good choice for vocals.
DI’s, microphone pre-amps and Mic vs. Line inputs
A DI-box (stands for Direct Injection) is not a microphone. But because it behaves that way in practice, we’ll talk about it here as well. And then you also come across the terms mic pre-amp and line- and mic level. So let’s cover that too!
Microphone Pre-Amps and Mic/Line inputs
A microphone generates very few volts. Far too little for a mixer to work with. That’s why you always use a microphone pre-amp. It boosts the signal from the mic so it can be used in the mixer or in the audio software. On an audio interface with microphone inputs you always find a built-in microphone pre-amp. But you can also use external pre-amps and you often pick one for it’s specific sound.
You can plug a keyboard or synth directly into your mixer or interface, of course you don’t need a microphone for that. But the level (amount of volts) of such a device is much higher than that of a microphone. So the microphone input can’t handle that. That’s why there are special ‘line inputs’ or ‘instrument inputs’ on your interface, which can handle the larger amount of volts.
DI’s
A DI is a kind of translation box between line and mic level. Below an image of a DI box from Radial. You insert an acoustic guitar, bass guitar or keyboard into the DI, which converts the signal to microphone level, the output of the DI then plugs into the microphone input. At the same time the DI does something else, it turns an unbalanced signal into a balanced signal. If you want to know all about this, have a look at this: ‘Cables & connectors: balanced and unbalanced‘.
So you have two options. Use the line input, or use a DI to convert the signal to mic level. Does it matter which option you choose? Technically there’s a lot to say about this, but I’d like to quote audio legend Joe Meek here, who said ‘if it sounds right, it is right’. Usually, microphone pre-amps are of higher quality and have a certain ‘sound’, they color the sound in a nice way. So if you have a good mic pre-amp, you’d probably best use a DI, so you can make use of this when recording synthesizers, bass guitars or keyboards.

Microphone sensitivity
Microphones have a side where they are most sensitive. The shape of that sensitivity can be shown in a picture:

In this image from Shure you see the three most common ‘microphone polar patterns’. Cardioid is the most common one. It is called that because the shape of the image looks kind of like a heart. There is also something called ‘super cardioid’, which is even more directional. The ‘figure of 8’ sensitivity pretty much speaks for itself. The last one is ‘Omni’, that means it’s sensitive from all sides.
These images from Lewitt Audio show you how this looks in ‘3d’. From left to right (or top to bottom on mobile devices): cardioid, figure-of-8, omni and super-cardioid.
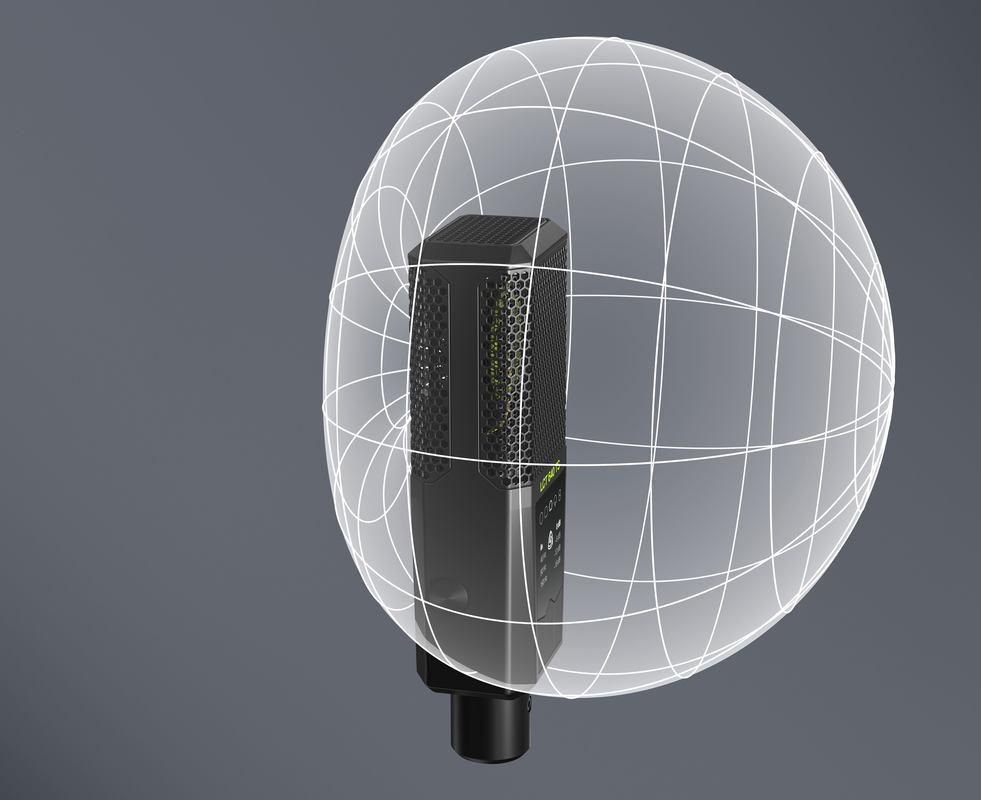
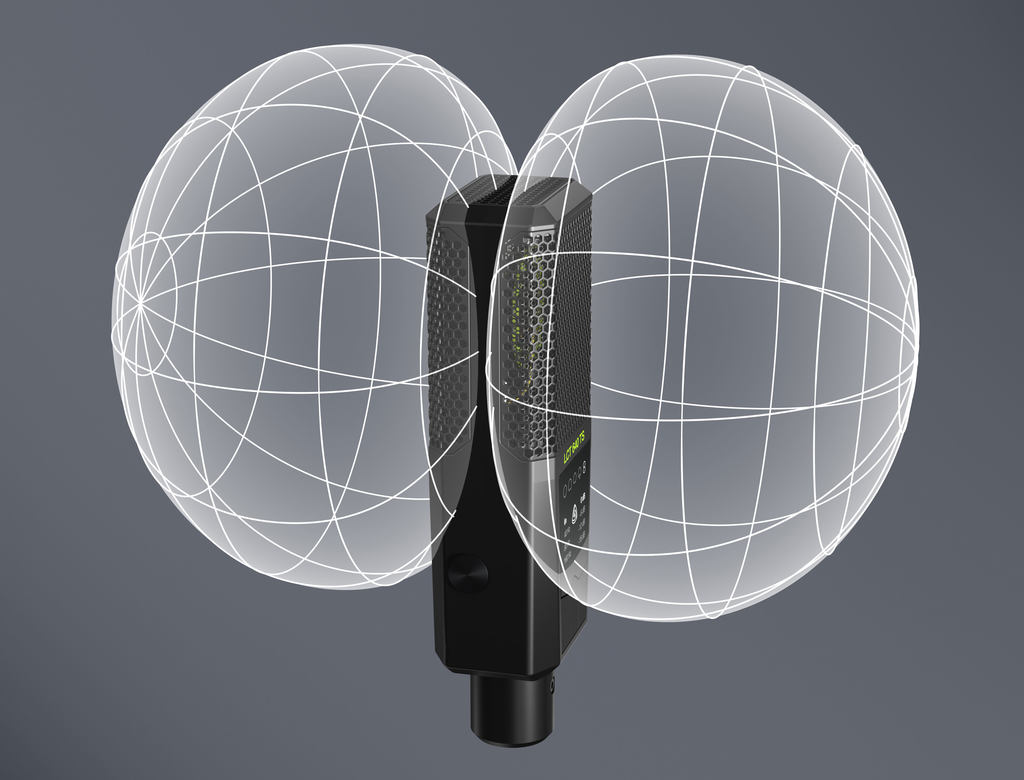
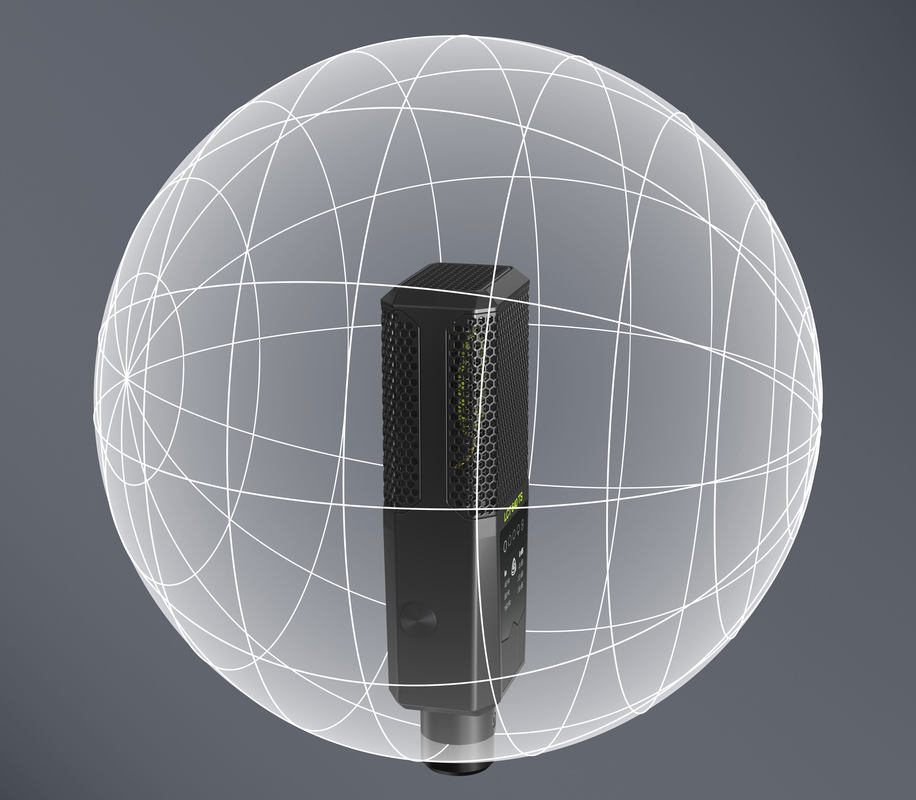
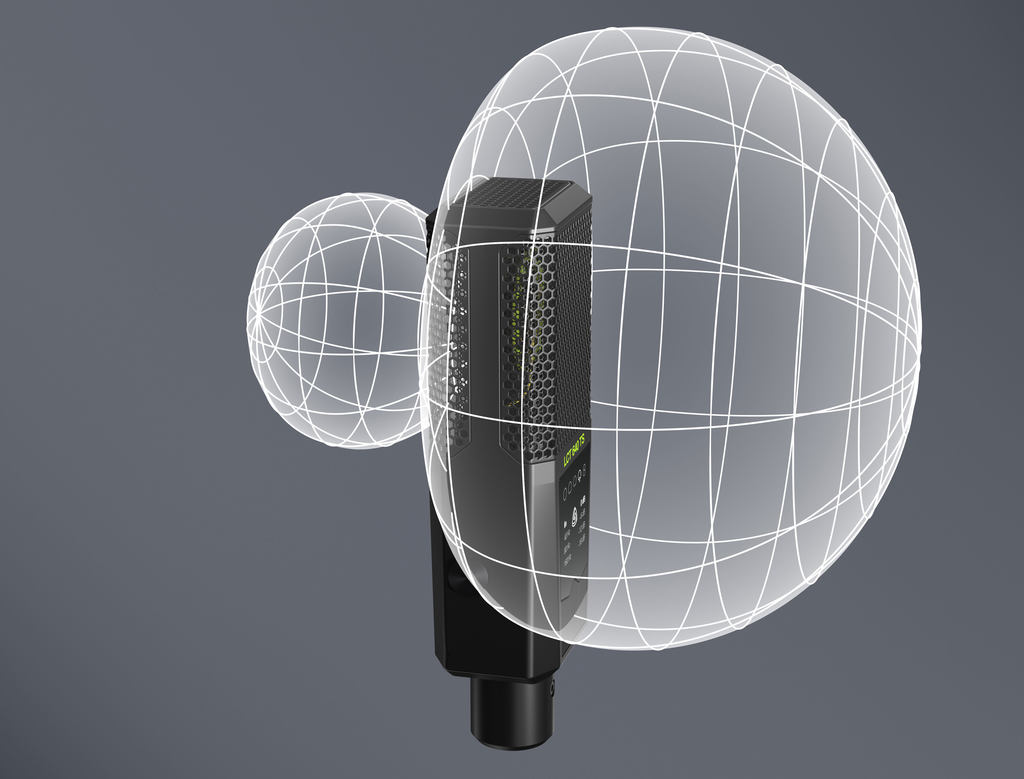
If you use a cardioid microphone and point it at an instrument, it picks up a lot of that instrument and not so much of the room reflections. Omni does pick up a lot of the acoustics of the room you are recording in. Figure 8 only picks up sound on two sides of the microphone. You can play around with this when recording: Do you want to record some of the room ambiance? Or do you want to prevent recording anything else but the instrument as much as possible?
More expensive condenser microphones often have an option to switch between polar patterns, so you can choose whether you go for (super)cardioid, Figure-8 or Omni.
Proximity effect
The proximity effect is the phenomenon where the sound you are recording has more bass the closer you put the microphone to the sound source.
It is a side effect of cardioid and figure-8 microphones. Omni microphones do not ‘suffer’ from the proximity effect. This is due to the construction of cardioid microphones and the technique used to make a microphone directional. In practice it is not so important to know how it works technically. It is important to know that you can make good use of the proximity effect. As a singer, get a bit closeer to the microphone and your voice becomes fuller and warmer. Radio DJ’s use this trick all the time. But you can also use it when recording instruments.
And with the proximity effect, we end our microphone tutorial. I hope the info you found here will translate itself to better recordings! 🙂 Still have questions or remarks? Let me know via gijs@audiokickstart.com.