An introduction to mastering audio for video productions
What will we cover in this tutorial:

So what’s “mastering”? Well, it actually consists of two parts. You’ve made your mix and all the tracks are perfectly balanced. In mastering you’re going to focus on the overall sound of the complete mix. Is there enough bass in your mix? Or maybe too much? Maybe it’s just too dynamic and the listener has to adjust the volume all the time?
These are all things you pay attention to in mastering. The tools you use are no different from the tools you use when mixing. Equalizers, compressors, limiters, etc. But often you have specialized versions of these tools. So specialized mastering EQ’s, mastering compressors, etc. These are often just a bit more subtle in their behavior.
Besides adjusting the sound of the complete mix, mastering also has a technical aspect. You will be saving your work as a master audio file. This can have a certain format, see ‘what audio format should I use’ for some more explanation about the different options you have when saving your precious mix into one audio file.
So, what are the steps taken in the mastering process?
What’s your video for?
During mastering you determine the overall sound of the video. And the purpose of your video is very important in this regard. Is the mix meant for cinema? For an iPhone? For TV? In mastering, this partly determines the choice of steps you will take. Here are a few considerations.

Mastering for TV
I often filter out everything below 75Hz. In most cases you won’t hear this on TV because of the small speakers that are used. In addition, filtering out the low-end gives more room to the mid and high end of the spectrum, where you will find the speech, usually the most important part of an audio mix for video. Also it is not necessary to mix very dynamically, this often doesn’t come across well on a very small speaker.
Mastering for cinema, or big live venues
If your video is played in a cinema or at some live venue, you probably want to add some more low-end and make the mix sound more dynamic as well. It’s very strange to hear a ‘small’ mix with little bass and little dynamics while the screen itself is huge. That creates a mismatch.
Mastering for web videos
Some people will see and hear the video on larger speakers, or good headphones. In that case a healthy amount of low-end is certainly nice. Others will see the video on an iPhone. There, all that low-end won’t even be reproduced. So a web video mix is somewhere in-between a mix for TV and a mix for cinema. Also in terms of dynamics. Some differences between loud and soft sounds can be nice, for example to work towards a climax. But don’t exaggerate: the video will probably mainly be viewed on smaller screens, and a very dynamic mix doesn’t quite fit then.
Mastering chain
Let’s have a look at the processing you use to get the sound right in mastering. What kind of processing you choose is a matter of taste. Below we will discuss the processing that is used the most. Some people like to use multiband limiting, stereo enhancement, exciters and sometimes even reverb when mastering a video.
In my opinion ‘less is more’. Your goal is to make sure the audio sounds as good as it can be. If your mix is good, you don’t need tons of mastering plugins to get the job done. You want a balanced frequency response to suit the medium the video is meant for and you want to optimize the dynamics and loudness. We will cover these basics below.
EQ
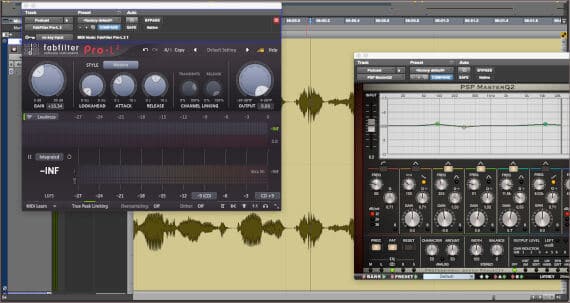
If there is any ‘cleaning’ to do (noise-reduction for example) you usually do that first. After that the first thing I do is EQ. I like the Linear Phase EQ from Waves, FabFilter Pro-Q or PSP Master Q.
Equalizing the whole mix is often done much more subtly than EQ-ing individual tracks. A good starting point for an EQ on the master fader is to add in a few dB around 100 Hz; cut a few dB around 400 Hz because it always sounds a bit ‘boxy’ in that frequency range. And maybe add a little bit of high frequencies for some sparkle and to make it sound a bit fresher.
BUT: Obviously it all depends very much on how your mix sounds. If there is a lot of ‘fresh sparkle’ in there already, don’t add even more during mastering, of course. So unfortunately giving standard settings doesn’t really work when it comes to mastering. And never forget: if your mix already sounds great, you don’t need to EQ at all. Keep using your ears! 🙂
Great, so you can forget what I just said. Now something that does help you: It’s best to listen to an example. Which video do you think sounds great? And how much low, mid and high is in it? And how dynamic or flat does it sound? Try to approach that during mastering. Always be realistic. You can’t make a jazz recording sound like a trance record only by adding the right mastering processing. The same goes for different styles of video. Mastering is the art of getting the best out of a mix as it is.

Compression
After EQ-ing I often use a compressor. Usually just to color the sound, not to adjust the dynamics. So making it sound a bit more ‘warm’, or ‘punchy’. To know which compressor gives you the right sound, check out ‘Picking the right compressor’. Keep in mind that the compressors in this tutorial are all mixing compressors, not specialized mastering compressors. But it can give you a direction, because you’ll learn that for a ‘warm’ sound it makes most sense to try a tube compressor first. Besides that, I regularly use one of the compressors from that tutorial during mastering anyway. If it sounds right, it is right!
With mastering compression subtlety is important: Use a somewhat lower ratio (2:1 for example) and try not to make the mix completely flat. Make sure that the louder peaks are reduced a bit in volume, and then listen if this makes the sound better.
How loud?
When you watch a video on Youtube or Vimeo, you want it to sound just as loud as all the other video’s. And this is very tricky, because on the internet there is actually no real loudness standard.
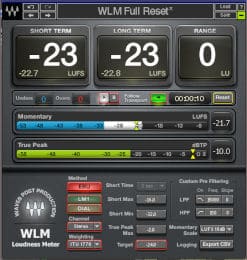
When your video is meant for TV, it has to meet strict sound requirements: EBU R-128. These requirements determine exactly how loud your mix has to be: -23LUFS. No idea what I’m talking about? See ‘Mixing for TV: EBU R-128 and LUFS‘ for some more information.

For mixing web videos, I also like to use an EBU R-128 meter. But instead of mixing at -23LUFS, I make sure the volume is around -14 or -15 LUFS. Then you’ll be fine on Youtube. Sometimes you can use a brick wall limiter (like the Waves L2 or FabFilter Pro L) to attenuate the loudest peaks so you can increase the total volume. Pay attention when using such a limiter though. It also colors the sound and if you use it too violently, your mix becomes flat and lifeless.
When using a brick wall limiter, start by setting the threshold in such a way that you can see a little bit of gain reduction on the meter. Then start listening: Is it getting better? “Punchier”? Or does it work counter productive and does it affect how ‘open’ your mix sounds?
If you’re satisfied with the overall sound and the level is good, all you have to do is render your master to an audio file. I always use WAV, 24 bit, 48 kHz when it comes to mixing for video. This is the broadcast standard, but I don’t really use anything else for web video either. Using the same settings but choosing the AIFF format also works perfectly fine.
After that, it is time to import your master audio file back in your video editing program and render the video. And put it on Youtube and receive thousands of likes, of course. 😉
I hope you found this tutorial useful. If you have any questions or comments, feel free to email me at gijs@audiokickstart.com.

