An introduction to sound design
What will we cover in this tutorial:
– How to get the right sounds
– Fitting library sounds with your production
– Recording your own sounds: Foley
– Tweaking the sounds
Sound design. Nice word, but what is it?
Wikipedia defines sound design as follows:
“Sound design is the art and practice of creating sound tracks for a variety of needs. It involves specifying, acquiring or creating auditory elements using audio production techniques and tools.”
Great definition. But what exactly does the sound designer do to create all those ‘auditory elements’? And what exactly are they?
As an example, picture a scene from a science fiction movie in which gigantic (hostile) robots walk through the city and threaten the main characters. Apart from the dialogue of the actors, this scene will probably contain exciting music. But such a non-existent giant robot will also make sounds, for example when walking. And if he also carries any futuristic weapons, they will also make sound when shooting, of course.

But what kind of sound does a non-existent giant robot with futuristic weaponry make?
That is up to the sound designer!
But not only gigantic robots in movies have to have the right sound. Cars driving through the city also make sound of course. Or footsteps. Or the murmur in a restaurant. All work for the sound designer. Because almost all the background sounds you hear in a movie are not the original sounds. They were added later. The reason for this? To have more control over them in the mix, to make sure they have more impact or to make sure they are not too distracting.
Let’s say a movie has a romantic scene that takes place in the middle of the city, at some point you may only hear romantic music and the conversation between the actors. All the noises of the city suddenly can’t be heard for a moment….
How to get the right sounds
I’ve done a lot of sound design from the studio in my house. To make the right sounds I often just went all over the house looking for the right objects. But I only cared about the sound this thing produced, not about what it was exactly.
So after a while, my wife didn’t really look up when I went back into my studio with half a bottle of wine, a broken Disney umbrella from the kids and a piece of drainpipe from the shed. As long as it makes the right sound, it’s all good.

Libraries
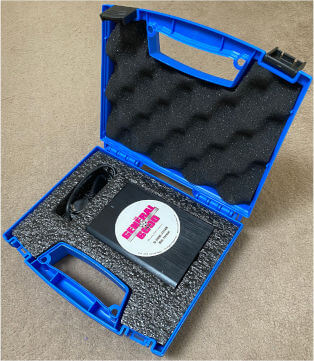
Don’t have a broken Disney umbrella or a microphone? You can get a lot of sounds from a sound library. Famous libraries include Hollywood Edge and Sound Ideas. They can ship the SFX on a nice harddrive in an even nicer case if you want, see image above.
You certainly have heard sounds from these libraries, even though you might not know it. They are used in many movies. Put on any Disney movie and you’ll probably hear a bird, bleep, whoosh or car horn from one of these libraries. But there are many more libraries, such as SoundSnap.com. The sounds there are often ‘hit or miss’ if you ask me: either very good, or totally useless. Splice is another example of a common library with great sounds.
I’ve also compiled my own sound effects library over the years. One that doesn’t contain an infinite number of sounds, but only the sounds you use a lot. This library is for sale here, so have a look!
Fitting library sounds with your production
Whatever library you get your sounds from, it’s good to realize that you can hardly ever use those sounds ‘as is’ in your mix. I once worked on a sound design job where I had to add sound to an avalanche. One that was quite prominent in the picture. So then it makes sense to start looking for ‘avalanche’ in the library. But this didn’t work, the sound was totally unbelievable. It lacked impact and violence and didn’t match the video. And no matter what ‘avalanche’ sound I chose, there was always something wrong with it.
The trick is to look at the image and learn to see what you’re missing. The best thing to do in these cases is to see what materials produce the sound in the video (so snow, ice and wind in my case) and imagine what kind of sound this would produce.
This also depends on how far away from you the scene takes place. If someone is throwing planks, it’s obvious what kind of sound you need and from which material. But it’s still important to see whether you’re near or far away from those planks as the viewer.
Because as you can see in the tutorial on ‘Mixing‘, when you’re farther away, it not only sounds a bit softer, but you also miss a bit mids and highs. And you might hear some more reverberation from the room. You can simulate this all with EQ plugins and reverb plugins, but often it is better to just look for a sound effect that is clearly recorded with some more distance.

That always sounds more natural. Working the sound for drone shots of a city for example, this is very important. Putting ‘just’ city sounds underneath it does not work if they are recorded in the middle of the city. You need a recording that was taken a little farther away from the city.
In my example of the avalanche I looked purely at what you would expect hear, given the materials and how far away you are as the viewer. In the beginning of the movie the avalanche was still far away, but the snow was getting closer and closer.
So it makes sense that you first hear some more ‘rumble’ in the distance, and later when the snow is near the camera, the ‘hissing’ effects of snow flying around your ears.
The nice thing is that when you see and hear that, you are no longer limited to just the sound of an avalanche. Because that ‘rumble’ you can also get from a sound effect of an earthquake. Or use an explosion, cut the very first part off so you only hear the tail of it and it might sound just right.
The sound of snow closeby was something I couldn’t find in the library either. I ended up using the sound of a tree falling over. The rustling of the leaves gave exactly the ‘hissing’ sound I was looking for. Here again I had filtered out all the low end, because I only cared about the ‘hissing’. This was complemented by the original sound effect of the avalanche, a skier splashing some snow and some wind noise. Now the sound seamlessly matched with what you saw in the picture.
Recording your own sounds – Foley
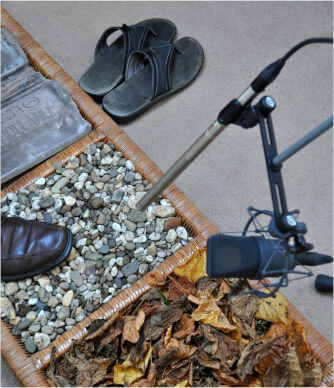
It may not be easily done for everyone (depending on your setup), but as I said, sometimes it is better to record sounds yourself. And often it’s even easier too. You can spend hours searching for the sound of a spoon that is stirring in a cup. But it happens that it just doesn’t fit the image, no matter how you edit and tweak the sound.
In that case it’s often much better to grab a cup from the cupboard, a spoon from the drawer and while you look at the video, record the stirring sound. And you will end up with a custom made sound effect that fits the video perfectly.

Of course you should use a good microphone for this. I would suggest to use a shotgun microphone for it, like the one on the camera or in a boom pole. For example a shotgun microphone from Røde, or the Sennheiser MKH416. This could very well be the mic that has been used the most in film and TV over the decades. Shotgun microphones (and certainly the MKH416) therefore often give you the sound you ‘expect’ to hear and the sound will match the set-noise because it is often recorded with such a microphone too.
For simple recordings like this you don’t need a completely soundproof studio: a reasonably quiet space is good enough for short recording sessions where you keep the microphone close. If you want to re-record all ‘every day sound effects’ for a movie, it’s another story.
Actually, there is a name for that: Foley. In movies most every day sounds are re-recorded in specialized studios. In the clip below you see a Foley artist at work:
Tweaking the sounds
Once you’ve found or recorded the right sounds, it’s time to start tweaking them to match your production.
EQ is your best friend
It’s not always as hard as in the avalanche example I mentioned earlier to make a library sound fit with your production. Often all you need to do is edit it a little with an EQ to make it fit much better.
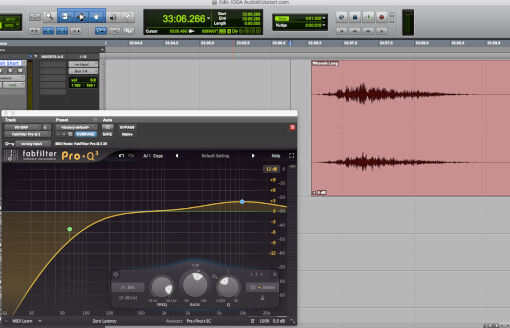
As an example, let’s say you have found a ‘whoosh’ sound for a title transition in the video. It fits perfectly in terms of timing. But it sounds way too heavy. A low-cut filter can do a lot here, of course. Also add a bit mid and high frequencies (between 5 and 10 kHz) and your whoosh sounds a lot lighter. Tweak it until the sound fits the image.

Placing sound effects: With everything ON
When I create sound effects and put them under a video, I always do this with the music and voice-over ‘on’. So I don’t mute them. You’ll immediately hear how something falls into the overall mix. If you mute everything except the sound effects, you might spend half an hour tweaking on something you don’t even hear in the total mix. Or you notice later on that a certain sound still needs a lot of equalization because it doesn’t fit nicely in the mix.
Of course I also listen to the sound effects in ‘solo’ when tweaking them, but after that I listen to the whole mix again.
When you’re done creating (or searching and placing) sound effects, it’s time to mix them with the voice-over, dialog and music tracks. Want to know more about that? See our tutorial ‘Mixing audio for video – The mixing process’.
Questions about this introduction into sound design? Mail me at gijs@audiokickstart.com

